How to Set Up Rim Brake Pads for Your ENVE Wheels
The latest ENVE brake track has a texture molded into the surface, providing exceptional power and control in both dry and wet conditions. It isn’t especially sensitive to pad positioning but it pays to get your brakes set up perfectly. To that end, we asked pro mechanic Rob Van Der Brand at Team Dimension Data for his tips on pad set-up. Find a step-by-step guide at the end.

The extra stopping power of the textured brake surface does mean that pads tend to wear faster. “We check them every day,” says Rob, “and we change them early because one race day can cause so much wear.” That’s the first bit of ‘take home’ – check your pads regularly for wear and contaminants, cleaning out the grooves when you do, keep a spare set ready to fit and swap them ahead of any big ride or race. Remember, too, that wear rates can vary a lot between riders and routes.
“Pad wear depends a lot on the rider’s technique, too,” Rob tells us. “Sometimes we see one of the bigger guys finish a stage with very little pad wear on the same day as a light rider really killed his pads.”
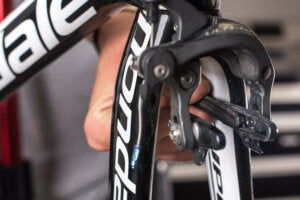
When it’s time to replace your pads, first secure your bike in a workstand and drop your wheels out for easier access. Then undo the small securing bolts (Campagnolo brakes use clips) and slide the pads out the back of the carriers – you can use narrow pliers if they’re tight. Take the opportunity to clean around the calipers and also inside the pad carriers as any dirt or residue will make it harder to slide in the new pads. If the new pads are still a tight fit, DO NOT be tempted to use a lubricant as you will dangerously impair your braking (this sounds obvious but we wouldn’t mention it if we hadn’t heard of it being done!). A little water or spit will help to ease the pads in safely. Nip up the pad securing bolts, being careful not to over-tighten them as they are easy to round out.
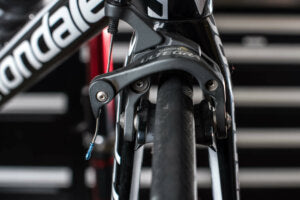
If you’re simply replacing your ENVE pads, you shouldn’t need to alter the position of the carriers, only unwind some cable tension to open the caliper up to allow for the greater thickness of the new pads. Check the pads are aligned with the centre of the brake tracks and you’re good to go.
If you’re installing ENVE wheels and pads for the first time, it’s possible that you will need to significantly adjust your pad position. First, release the brake cable from the caliper to allow it to fully open, then secure your new wheels in place. Pinch the caliper closed against the rim with one hand, allowing the cable to pass through the caliper, and have an Allen wrench in the other hand ready to close the cable bolt. Release the caliper slightly and nip up the cable bolt. Check that the pads are the correct distance – 1-2mm – from the rim and then securely close the cable bolt. You can fine tune the pad distance with the cable tensioner but remember that this is to adjust for pad wear – if you need several turns you should reset the cable position.
Next, release the pad carrier bolt and line up the pad with the centre of the brake track, ensuring it is aligned throughout its length and that the face of the pad is parallel to the brake track as it makes contact.
Now give the pads some ‘toe in’. This means angling the pad so that the forward end is slightly closer to the rim than the rear end, 0.5mm is all you need. This helps to prevent brake squeal and also provides a more progressive brake action. “There are special tools to help with this or you can use something like a business card,” says Rob, “but we do it by eye.”
He continues: “There are two things that can cause brakes to squeal. One is having the pads set too straight and the other is if the pad is glazed from over-heating. If you drag the brakes on a descent you make a lot of heat and sometimes you see the pads get black and shiny. If that happens we always change them.”
While pro teams enjoy an unlimited supply of pads, at home you can also use grit paper or a file to rub down and refresh glazed pads. Place the grit paper on a flat surface and then rub the pad along the paper, being careful to preserve the angle of its face which is easier to do this way than if you place the pad down and move the file or grit paper. Wear gloves to safeguard your fingertips! Do just enough to remove the glazing and reach fresh pad material. If the pads are mostly worn already, we recommend replacing them rather than going too near to the wear limit. While the pads are out, clean the dirt from the grooves.
After working on your brakes, always check you have tightened everything properly, give your bike a test ride in the street and then recheck. Then go have fun.
• Check your pads regularly for wear and contaminants such as sand and stones
• Never use the same pads on alloy and carbon rims as shards of alloy can be picked up by the pad and transferred to the carbon brake track
• Fit new pads before a big, mountainous event
• Clean the carriers after removing the old pads
• Check pad alignment
• Toe in slightly to avoid squeal and increase feel
• Don’t over-tighten the security bolt
If you are not a confident and proficient mechanic, we always recommend that you have your ENVE dealer install wheels and brakes.


Step-by-Step Guide
- Secure your bike in a workstand and drop your wheels out for easier access
- Undo the small securing bolts (Campagnolo brakes use clips) and slide the pads out the back of the carriers
- Clean around the calipers and also inside the pad carriers
- Insert new pads and nip up the pad securing bolts, being careful not to over-tighten them
- If you’re simply replacing your ENVE pads, release some cable tension to open the caliper up to allow for the greater thickness of the new pads, then check the pads are aligned with the centre of the brake tracks and you’re good to go
- If you’re installing ENVE wheels and pads for the first time, it’s possible that you will need to significantly adjust your pad position. First, release the brake cable from the caliper to allow it to fully open, then secure your new wheels in place
- Pinch the caliper closed against the rim with one hand, allowing the cable to pass through the caliper, and have an Allen wrench in the other hand ready to close the cable bolt. Release the caliper slightly and nip up the cable bolt
- Check that the pads are the correct distance – 1-2mm – from the rim and then securely close the cable bolt
- Release the pad carrier bolt and line up the pad with the centre of the brake track, ensuring it is aligned throughout its length and that the face of the pad is parallel to the brake track as it makes contact
- Now give the pads some ‘toe in’. This means angling the pad so that the forward end is slightly closer to the rim than the rear end, 0.5mm is all you need
- Test ride at low speed, re-check and then you’re done


